Exercise 2.2: Flower Parts with Quill and Ink
In this exercise, we will focus on techniques with quill and ink while learning the details and parts of a flower. Below you will see a review diagram of all the parts that make up a common flower. Ink is a great artistic medium to work with. Mastering the technique of ink will allow you to add beautiful detail and sharp strokes and outlines to your drawings. There are a few different types of ink you can choose from. India ink is usually black and can come in both waterproof and non-waterproof. Waterproof ink is best used with a quill. Absorbent paper that has a polished finish is the best surface for illustrating with ink. Becoming an advanced illustrator you should have the basic background of how to use quill and ink. For quick review, practice with your quill and ink by varying your lines and shadowing techniques. In this exercise we are going to create a technical plant parts illustration.
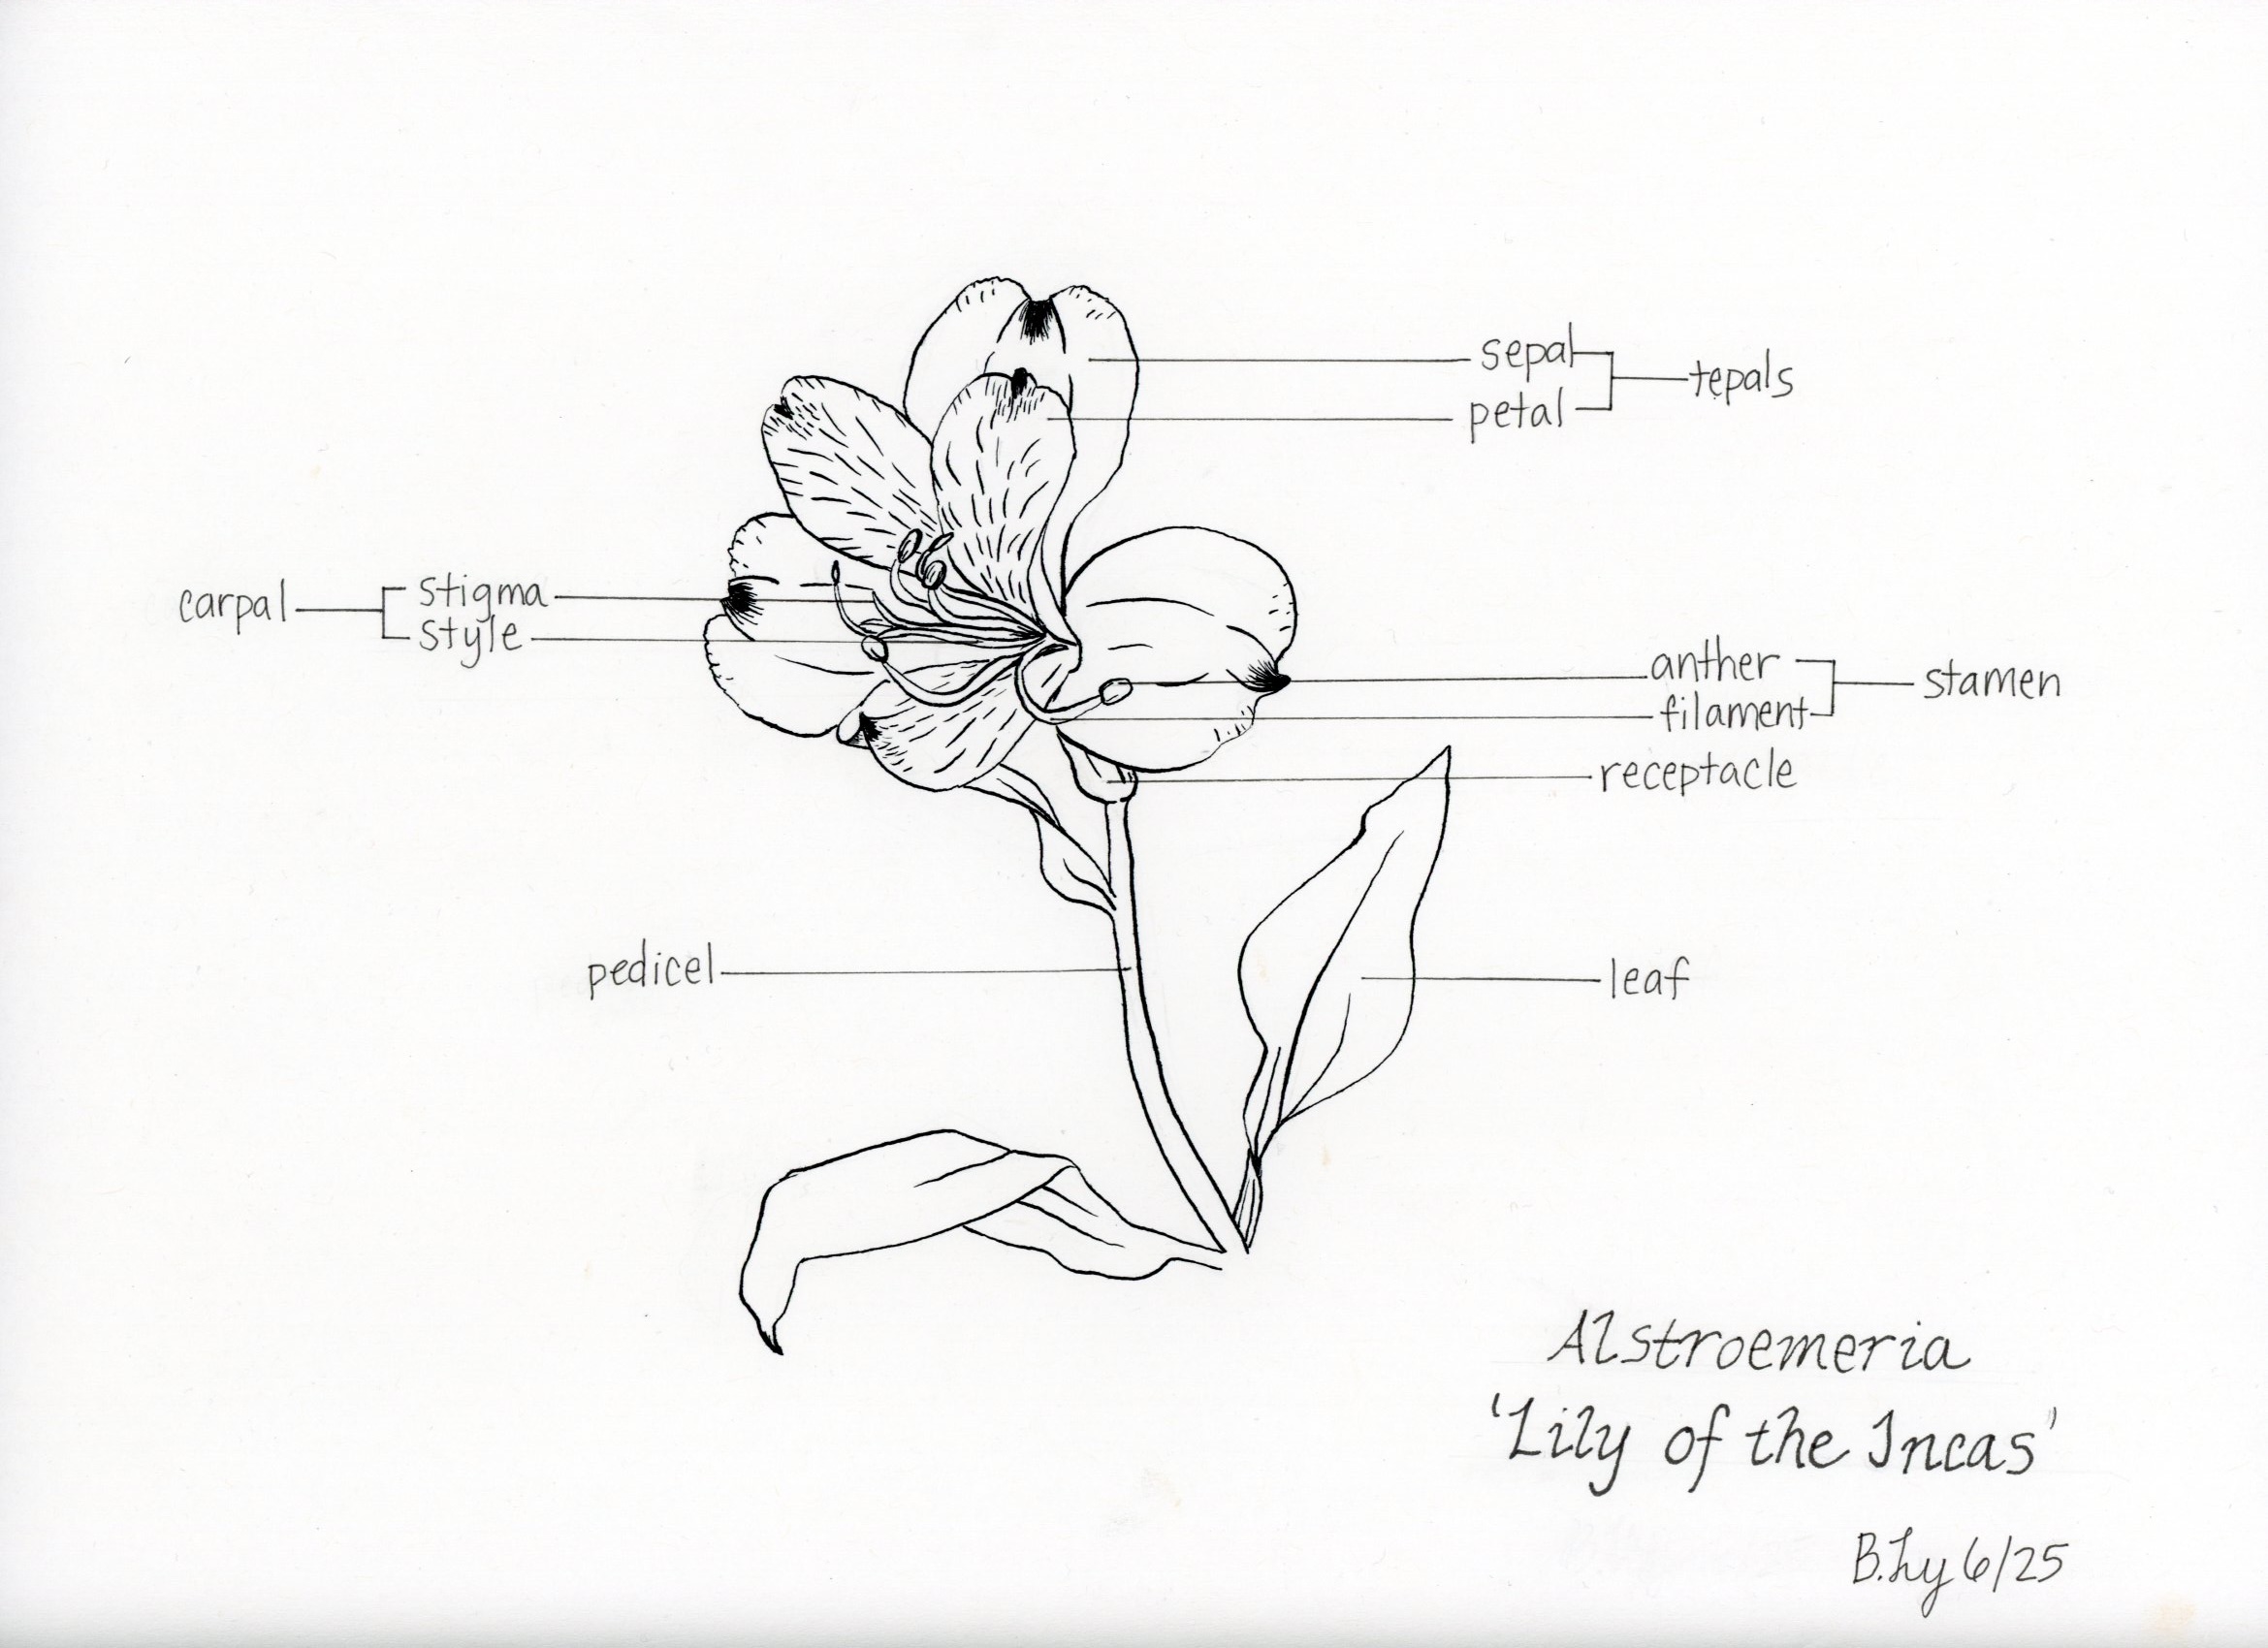
Drawing Credit: Work by Bethany Ly, student in 2025
For this exercise you will need to obtain a flower with a great degree of detail. Examples include a daylily, an orchid, alstroemeria, or rose; you may want to select a single stem from your garden or a florist shop.
Set your single flower in a vase close enough so you can see all the details of the flower. Observe and write down all the parts. Using your pencil, lightly lay out the outline, composition and form of your flower. Then, with your quill and ink start to lightly trace your outline. Having patience with quill and ink is very important! It can become a mess if you are not focused. Working with ink in a quiet and comfortable setting with good light is critical.
Work on this for at least 30 minutes. Once the illustration is complete, label all your plants parts. You may either use a micro pen for lettering, or if you are up for a challenge, use your quill and ink to label each plant part. Here is a nice article on flower parts: https://americangardener.net/parts-of-a-flower-and-their-functions/
If you'd like to go further, you can use a craft knife to dissect the flower and observe inner structures with a magnifier. A good article on flower dissection can be found at https://www.wikihow.com/Dissect-a-Flower
Becoming familiar with the flower and all the details is key when creating successful technical botanical illustrations.
Scan your assignment when completed (and dry so you don't ruin your scanner). Again, if you know the scientific and common name of your specimen, write it on the bottom right hand corner either on the front or back of your work. If you only know the genus of your plant - i.e. Hemerocallis sp. (Daylily), that is fine to use. Also remember to sign and date your work.
